Pest Control Tips for Apartment Dwellers

Pests are organisms that interfere with human activities, damage property, or pose a health threat. The goal of pest control is to reduce their numbers to an acceptable level with as little harm as possible to people, animals, plants, and things of value.

The first step is correct identification. Other steps include prevention, suppression, and eradication. Contact Pest Control Quincy now!

The first step in developing an effective pest control strategy is accurately identifying the pest. Incorrect identification may lead to costly or useless control measures that can actually worsen the problem.

The different pest species vary in their life cycle, behavior and preferred food sources. A knowledge of these differences allows the pest management specialist to discover the pest’s weaknesses and develop an appropriate control strategy. Pest identification also enables the pest control specialist to determine basic information about the pest, such as its physical characteristics and environmental conditions that affect its development and population.

A number of techniques can be used to identify pests, and each requires a certain amount of skill and training. For example, plant disease organisms can be spotted by looking for certain symptoms on the plants in a field. Pests that damage crops typically have specific chewing or sucking mouthparts. For instance, the caterpillars of many butterflies and moths and the larval stages of several beetles destroy leaves, fruit or roots, while plant bugs pierce the plant tissue, sucking out the sap.

Identifying pests is especially important when it comes to Integrated Pest Management (IPM) strategies. These strategies are designed to use natural methods of controlling pests before they become a serious problem and do not involve the use of chemicals.

IPM strategies are based on the idea that pests can be managed at all stages of their life, from egg to adult. These strategies are generally more environmentally friendly and less costly than chemical treatments. They are often more successful at controlling pests and can prevent them from becoming resistant to the chemicals used to kill them.

One of the most important parts of IPM is “field scouting” which involves monitoring the pest population and crop progress. To be most successful, the scouting must be done in a way that is representative of the whole field. This means entering the field from a number of different points, and sampling each area. Identifying the location where pests tend to congregate can help control the pest population by focusing pesticide applications on this area.

Pest Prevention

Pests pose many risks to communities, including health hazards and structural damage. Rodents like cockroaches and mice carry bacteria that cause foodborne illnesses, can gnaw through wires and wood causing fires, and affect indoor air quality, triggering asthma and allergies in children and adults. Cockroaches and rodent droppings can also contaminate food. Pests are a nuisance that disrupt our daily routines and can cause psychological stress.

A pest prevention program helps to eliminate the need for pest control in the first place. Unlike reactive pest control methods, preventive pest management includes regular inspections of facilities by trained staff, targeted treatments inside and outside of buildings, and specific enhancements to prevent entry of pests. It also focuses on sanitation and maintenance, such as preventing food from becoming spoiled or stored in improper conditions and locating dumpsters away from building entrances.

An effective pest prevention program can take some time to establish, but once in place it provides long-term benefits. It can lower a company’s risk profile and help it to meet or exceed the requirements of the FSMA. It can also help facility, property and QA managers avoid costly product recalls or having their products rejected by customers due to pest problems.

Prevention begins with an initial inspection of a facility by a trained technician, who will identify entry points and areas where pests are most likely to gather. Based on this information, a customized treatment plan will be created. Treatments may include a variety of options such as baiting, spraying, or trapping.

The most important part of pest prevention is good housekeeping and sanitation. This includes keeping waste bins tightly closed, taking out trash regularly and properly, and storing food in containers with tight lids. It’s also important to keep windows and doors shut as much as possible, and use caulking or weather stripping to seal any gaps and cracks. Door sweeps and dehumidifiers can be used to help keep wet areas dry.

It’s also a good idea to understand pest life cycles, as some interventions can only be effective at certain stages of development. Knowing the lifespan and life cycle of a pest will help you to better predict when they might be invading your home or workplace. This will help you to decide whether or not the pest is a nuisance and needs to be controlled, or if it can be tolerated.

Pest Suppression

Pests can cause economic or aesthetic damage to crops, landscapes, buildings and home gardens. The goal of pest control is to prevent or reduce damage. This is often achieved by a combination of approaches. Preventive controls aim to deny pests the food, water or shelter they need.

Scouting and monitoring allow the detection of pests, and help determine when control is necessary. Monitoring can also indicate whether a particular prevention technique is working or not.

Cultural controls include practices that reduce pest establishment, reproduction, dispersal or survival. These include crop rotation, soil cultivation techniques, and changing irrigation practices. Adding or removing habitat can also decrease pest populations. For example, removing fallen fruit from around trees can discourage birds that are important predators of plum curculio beetles and other caterpillars. Removing overwintering debris or weeds can decrease aphid, caterpillar and other pest numbers.

Biological control uses natural enemies-predators, parasitoids, disease organisms, and competitors-to reduce pest populations and their damage. These can be introduced from the wild, or bred in the laboratory and then released. Examples of biological control agents include viruses, bacteria, fungi and nematodes. These organisms usually target one or more specific pest species, and so are unlikely to harm humans, animals, beneficial insects, or plants.

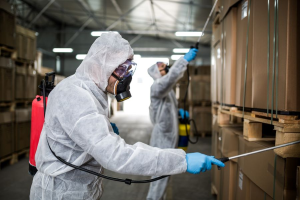
Chemical control includes the use of products that kill or inhibit a pest’s growth, feeding, mating, or other essential behavior. Chemicals can be natural products or synthetic compounds. Examples of chemicals used to control pests are herbicides, insecticides, and pheromones.

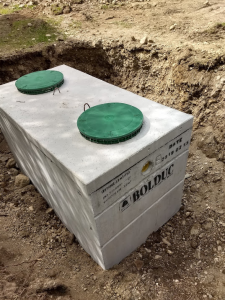
Eradication is the most difficult goal to achieve in outdoor pest situations. However, in enclosed environments such as greenhouses, or homes and commercial buildings, eradication may be possible using exclusion, quarantine, repulsion, physical removal or sterilisation programmes.

To successfully control a pest, it is important to understand its life cycle and behaviour. This will allow you to choose the most appropriate control measures. The key is to recognise that controlling a pest requires a balance between prevention, suppression and, if necessary, eradication. Prevention is the most cost-effective approach. Suppression is reducing the number of pests to an acceptable level. And if eradication is required, it should only be done when all other alternatives are considered to be unacceptable.

Pesticides

Pesticides are chemicals that kill pests, such as insects, weeds, mildew and rodents. They are used to protect crops, food and other plants, as well as people and pets. They are available in a variety of forms, and they can be found in many household products. Some are natural, and some are synthetic. The Environmental Protection Agency (EPA) regulates pesticides in the United States. EPA’s activities include research, grant programs, monitoring of environmental conditions, enforcing regulations and public education.

Pesticide use is most effective in combination with other pest control methods. These may include routine scouting, physical barriers such as netting and planting resistant varieties. Some of these techniques are referred to as integrated pest management (IPM).

A wide range of pesticides exist. Some are biodegradable, which means that microbes and other living things can break them down into harmless compounds. Others are persistent, which means they don’t break down quickly or can accumulate in the environment. The type of pesticide used also makes a difference. For example, organophosphates are less persistent than other insecticides, but they are also more toxic to people and animals.

Insecticides can be incorporated into the soil to control grubs and worms, or applied directly to plant foliage to kill moths and other above-ground pests. Fungicides are also used to control fungi. There are even a few antimicrobial pesticides, which are mainly used by poultry companies to disinfect their facilities and prevent the spread of avian flu.

The primary advantage of pesticides is that they can save farmers by controlling unwanted organisms that might otherwise damage or degrade crops and disrupt the food supply. A secondary advantage is that they can provide more consistent yields than manual or mechanical methods.

It is important to remember, however, that pesticides are not without risks. Some of these risks can be short-term, such as headaches or nausea. Others are more chronic and can cause cancers, reproductive harm and neurological problems. People should always read labels and follow all directions when applying pesticides, especially around children and pets. They should also try to avoid using them when they don’t really need them.

The Basics of Septic Tank Design and Construction

If you have a septic system, you should know that regular pumping of the tank is essential. Failure to do so could lead to the drain field or leach field becoming clogged with solids and groundwater contamination.

A septic tank holds wastewater and solid wastes until bacteria break it down. Solid wastes form a top layer that’s called scum while wastewater and sludge make their way to the drain field or leach field. Click the https://www.septictankarmadale.com.au/ to learn more.

Septic tanks are simple, effective onsite wastewater treatment systems that allow for the safe disposal of residential wastes. A septic tank is an underground watertight container (usually rectangular but can also be round) made of concrete, fibre glass or plastic. It has partition walls separating it into compartments and a sealed outlet. The septic tank holds all the excreta and wastewater from your household plumbing. It also provides a biological digestion process that reduces the size of solid wastes, preventing them from clogging the drain field.

The inlet chamber of the septic tank has an outlet baffle that allows the liquid portion of the wastewater to pass from the top to the bottom layer, while retaining any solids that are too large to be broken down by microorganisms. The septic tank has one or more inspection ports. These should only be used by qualified septic system professionals. Doing so could damage the septic system and cause the septic tank to leak.

As the septic tank fills, the heavier solids sink to the bottom of the tank in a layer called sludge. The lighter materials such as grease and laundry float to the surface and form a layer known as scum. Microorganisms digest the scum layer. As the sludge and scum layers rise and fall, they agitate the liquid wastewater at the bottom of the tank, allowing it to break down.

When the tank reaches its capacity, the solids and sludge settle to the bottom of the tank and the liquid wastewater passes through a large opening into what is called the drain field or absorption field. This is a series of underground pipes in a gravel trench that extends into the soil underneath. The septic tank sewage is leached into the soil where it is further treated by filtration and absorption by the grass and earth above.

Keeping the drain field free of debris and obstructions is essential. You can do this by limiting the number of loads you run per day and by reducing the amount of laundry and dishwasher detergents that go down the drain. Don’t plant trees or park vehicles over the drain field or septic system as this can cause clogs and groundwater pollution. Regular pumping of your septic tank is another way to ensure the proper functioning of your septic system.

Septic Tank Design

Septic tank design is very important because the tank is where all the wastewater from your home comes in and out. If it is not designed correctly or not properly constructed then a lot of problems can arise that may cause the entire system to fail. There are a few key components to septic tanks that need to be kept in mind when designing and building your septic system.

The first component is the inlet pipe that leads into the septic tank. This needs to be a size and material that is sturdy enough to withstand the weight of your household waste. It also needs to have a slope of at least 2% all the way from your toilet to the inlet pipe to ensure that a proper flow is achieved.

Once the wastewater enters the septic tank it will begin to settle. It will form a layer of scum at the top and a layer of sludge at the bottom. This layer will continue to grow with the use of the septic system until it is time to have the tank pumped. This is normally done on a routine basis by a licensed septic disposal company.

A septic tank should have a baffle to prevent solids from flowing out with the wastewater. It also should have an outlet to ensure that the sludge and scum layers do not overflow. The septic tank should also be large enough to allow for regular desludging and inspection.

Lastly the septic tank will need to be able to hold the liquid waste for at least three to eight years before it needs to be emptied. This is because the sludge and scum layer will continue to build up over time. If the sludge and scum are allowed to build up too much it could lead to a failure of the septic system in the future or cause a clog of the absorption field.

Once the wastewater leaves the septic tank it will travel into what is known as an absorption field, which is an area of your property that contains gravel trenches and soil that will absorb and treat the wastewater. In order to keep the absorption field in good shape it is necessary to mow the grass above and keep any trees or bushes away from it as they can grow into the pipes that run beneath the ground.

Septic Tank Installation

Septic tanks are an efficient system to treat wastewater, like a mini treatment plant in your backyard. But they can be confusing to install for homeowners who aren’t familiar with the process.

To get started, a septic tank contractor will perform a percolation test on your property and then design the system. Once the designs are approved, the excavation will begin. This is a labor-intensive step and can take up to three weeks. It’s important to work with an experienced septic tank installation company to ensure that the size of your septic tank is right for your home and that your leach field is correctly sized and located.

Once the excavation is complete, your septic tank can be installed. A reinforced concrete tank or a plastic/fiberglass one are both common choices. Once the tank is in place, it will be connected to your household plumbing so that wastewater can be transported to and from it. To make sure that wastewater is transporting effectively, it is important to keep the septic tank’s inlet and outlet pipes lined with the correct materials.

A septic tank works by collecting all the wastewater from your house, including sinks, toilets, laundry and dishwashers. This waste flows into the septic tank, where solid waste settles at the bottom and fats drift to the top. The liquid waste then leaves the septic tank through an exit baffle, which keeps solids from discharging with the wastewater into the drain field.

The septic tank must be properly sized to fit your home and prevent overflowing. Overflowing can contaminate soil and groundwater, and it can also cause sewage to backup into your home’s toilets. To avoid overflowing, a professional septic tank installer will install the proper sized septic tank for your home and will use the proper liner for your septic system’s inlet and outlet pipes.

A septic tank should be located on your property where it will be easy to access for routine pumping and inspection. To ensure that you can easily locate the septic tank, a riser should be installed over the tank’s central service hole instead of its sanitary tee or baffle inspection ports. Risers also make it easier to clean the tank and to inspect for a crack or leak.

Septic Tank Maintenance

All household wastes run through one main drainage pipe to the septic tank underground. Inside the tank, solid waste falls to the first chamber and is broken down by anaerobic bacteria and enzymes that turn it into a liquid. This liquid then flows over the half wall into the second chamber where it is pumped out into the drain field.

A well-designed septic tank can hold up to 1,000 gallons of water. It is usually precast from concrete and is buried in the ground.

The septic system must be maintained to keep it operating properly. If a homeowner is unsure of how to do this, the services of an experienced septic tank company should be called in for inspection and pumping. It is also important that the system be regularly monitored to ensure it is functioning correctly.

Ideally, the septic tank should be pumped before the sludge layer reaches 25 to 33 percent of the tank’s liquid capacity or the scum layer is four to six inches thick. The tank should be pumped more frequently if the home uses a garbage disposal or if there are excessive amounts of water used in the house.

As the wastewater leaves the septic tank it enters the absorption or lateral field, which is a series of pipes with holes in them in gravel trenches that are underground. From there, the sewage is absorbed into the soil and grass above.

In order for the septic system to work as designed, it is essential that homeowners not flush any items other than toilet paper, human waste and water down the drains. Chemical drain openers, solvents, cooking oils, sanitary napkins, latex paint and grease can all clog the drainfield.

It is also a good idea to keep plants and grass away from the septic tank and drainfield. In addition, a watertight riser and gasketed cover should be installed on the tank to allow for easy access in the future. Also, it is a good idea to keep automobiles and heavy equipment away from the septic system. Finally, it is recommended that the septic tank be inspected and pumped by a professional at least once every three years.

Business Insurance Bundles Key Coverages For Small Businesses

Whether you have a home-based business or an established corporation, the right business insurance policy will provide protection against everyday risks. It will safeguard your assets and income, and may cover legal costs (known as liability).

Some policies even combine property and liability coverage into one convenient package. Choosing the correct business insurance depends on your specific business risks, and some policies are legally mandated in certain states. Contact AZ Business Insurance now!

A Business Owners Policy, or BOP, bundles key coverages into a single policy to help small businesses manage risks and grow confidently. It typically includes general liability insurance and commercial property insurance.

General liability protection safeguards your business from claims made by customers for bodily injury and damage to their personal property while on your premises. It also covers legal fees if you are sued for reasons like product contamination, workplace injuries and advertising mishaps. Commercial property coverage helps reimburse your business for losses to fixed assets such as equipment, inventory and furniture if an incident occurs. It may also pay for other things related to a disaster, such as debris removal and loss of income.

In addition, a BOP may include other coverages, such as business interruption insurance or extra expense coverage. These provide reimbursement if an event disrupts your operations and requires you to shut down. These may cover rent for a temporary space, employee wages and the additional expenses of operating out of a different location.

The size and type of your business determines whether or not you’re eligible for a BOP. Current ISO business owners policy rules limit eligibility to firms with less than $6 million in revenue and a primary business location that measures under 35,000 square feet. This includes retail stores, apartment buildings and offices. Insurers may offer a micro-BOP for businesses with lower risk, low revenue and smaller commercial spaces.

If you’re looking for a BOP or other business insurance policies, NerdWallet recommends shopping with Next. This startup simplifies the process by offering quotes, purchase and renewal online. It also offers workers’ comp and other common types of business insurance.

General Liability

General liability insurance protects small businesses from third-party bodily injury and property damage. This coverage can pay for things like when a non-employee slips and falls in your business or if a client’s computer is damaged by your company’s work. It can also cover legal expenses and medical payments in the event of a lawsuit resulting from these incidents.

It’s a common form of business insurance and most types of businesses benefit from having it. It’s often the first type of policy that small business owners purchase because it shields them from many common, everyday business risks.

In addition to covering physical injuries, a commercial general liability policy can also protect your business against more intangible claims such as reputational harm or advertising injury. For example, if someone sues your business over something you or one of your employees said in an online review or social media post, it could cost thousands of dollars to defend your company.

Our licensed insurance agents can provide you with a list of coverage options for your business and help you select the limits that best meet your needs and budget. We offer both claims-made and occurrence-based policies for your commercial general liability. In addition, we can add liquor liability and errors and omissions (professional liability) insurance to your business policy.

Some industries are required to have a commercial general liability policy in order to fulfill the terms of contracts or leases. Others simply want to have the peace of mind it provides and know they can cover the costs of a lawsuit.

Business Auto

Your business may operate out of a car, truck, van or trailer, and any vehicle that’s regularly used for your business requires commercial auto coverage. This is not to be confused with personal auto insurance or a homeowners policy, which typically excludes business use of vehicles and only provides minimal protection in the event of a work-related accident. Without a BOP, you may be on your own to pay for damages, which could not only financially drain your company but also put your personal assets such as your home or car at risk.

A BOP is a tried and true combination of broad business coverages that can help you address many incidents at once. A typical policy contains business property and general liability coverages, as well as a business auto policy that protects your company cars, trucks and other vehicles.

The BOP’s business auto policy covers leased, hired and non-owned vehicles that you and your employees use in the course of operating your business. Some states require it to include medical payments and uninsured/underinsured motorists coverage. You can choose to add physical damage coverage that includes collision, comprehensive or specified perils as well.

Another option available through the BOP is professional liability, which offers protection if you or your employees are sued over their services. While it’s unlikely, a lawsuit against your business can threaten not only your livelihood but also everything you own. Adding this type of coverage to your BOP helps keep it affordable and provides peace of mind.

Depending on the nature of your business, your BOP may need to be customized for additional coverages. Talk to your independent agent to learn more about the coverages available through the BOP and how you can customize it to meet your specific needs.

Worker’s Compensation

Workers’ compensation coverage protects businesses from the financial impact of employee injuries. It also helps ensure that employees receive medical treatment that is necessary for a speedy recovery. In addition, it provides a mechanism for the settlement of employee death benefits. This coverage is mandated in most states and is typically included in a business owners policy.

Insurance rates are determined based on the experience of similar businesses in a given state. The losses of these businesses are aggregated into classes, and then economic factors are applied to determine the rate. Experience rating is more sensitive to the number of accidents (loss frequency) than to the dollar value of claims, because “frequency breeds severity.” A greater number of injuries may indicate that overall working conditions are less safe, even if the individual injury amounts are not very large.

All businesses must have a workers’ comp policy in place, and it can be obtained through a private insurer, the New York State Insurance Fund, or self-insurance. Self-insurance is becoming more common as a way for businesses to control their workers’ comp costs.

It is important to understand that the premium charged for workers’ comp depends on payroll. It is therefore critical that the payroll records of a business are accurate and updated on a regular basis. If a business experiences fluctuations in its payroll, it is important to work closely with the insurance agent to adjust the workers’ comp premium accordingly.

It is also important to note that any executive officer or director of a publicly held corporation who renders actual service for the company for pay shall be included in workers’ compensation coverage unless he/she elects to be excluded by executing a written waiver. Owners of private corporations receiving wages irrespective of profits may exclude themselves from workers’ compensation coverage by executing a written waiver.

Business Owner’s Policy (BOP)

A business owner’s policy (BOP) bundles general liability insurance and commercial property insurance, usually for less than if you bought each policy separately. Designed with small businesses in mind, a BOP can be an excellent choice for companies that have fewer than 10 million in assets or revenue each year and whose buildings and equipment are valued at less than $15 million. It’s important to note, however, that a BOP excludes coverage for things such as cyber liability protection for data breaches and workers’ compensation insurance for work-related injuries and illnesses. These specialized policies can be purchased separately, as needed.

General liability insurance safeguards your company against third-party claims of bodily injury or damage to personal property. If a customer trips in your store and breaks an arm, or if a client’s computer crashes, or if a staff member makes an inflammatory social media post that leads to a lawsuit, general liability can help pay for legal fees and financial settlements, up to a preset limit.

Commercial property insurance protects the physical assets of your company, such as furniture, office equipment and inventory. This is essential for small- and medium-sized businesses because it can cover items lost to theft, vandalism, fire or extreme weather. It may also provide reimbursement for lost income if your business is forced to close temporarily due to a covered event.

Many businesses can benefit from a BOP, including retail stores, small restaurants, apartment buildings and office-based services. However, it’s important to keep in mind that if your business has more than a few employees, has a higher revenue or asset value, or operates in an industry with higher risks, you might need a more tailored commercial insurance package.

How to Fix Drywall Problems

Drywall, also known as gypsum board, is a cost-effective and durable construction material. However, drywall is prone to damage that can cause structural problems and require expensive repairs.

Small holes can often be repaired by filling them with drywall joint compound (or mud) and then sanding it down. However, large holes or cracks should be left to professional contractors. Contact Drywall Repair Naperville IL now!

Nail pops are little protrusions on the surface of your walls and ceiling that result when nails used for securing drywall pull away from their original positions. These blemishes aren’t just unsightly; they can point to serious structural issues and indicate that it’s time for a foundation inspection.

They’re typically caused by changes in humidity and temperature, improper installation techniques, or a home’s foundation shifting over time. As the wood framing that supports your drywall expands and contracts, the nail or screw loses its grip and comes out of the stud. This causes the popped nail or screw to stick out of the wall’s surface, which can crack paint and cause a bumpy appearance.

Fortunately, nail pops are relatively easy and inexpensive to fix. First, identify the popped nail or screw by running your hand over the surface of your wall or ceiling to feel for raised areas or bumps. A stud finder can also help you pinpoint the location of these blemishes. If possible, circle the nail or screw with a pencil to make it easier to locate again later.

Once you’ve identified the problem area, tap lightly on it with a hammer to see if it will respond. If it does, use a hammer fitted with a small smooth head to gently hammer the fastener back into place. If not, try a drill with a #2 Phillips bit to drive the offending nail back below the surface of the drywall.

After you’ve tapped out the offending nail or screw, use a drill to insert two new screws about an inch above and below the popped location. This helps to prevent the offending nail from popping out again in the future and provides added support to your drywall.

Nail pops are usually only a cosmetic issue, but if you notice them everywhere in your house, it’s likely time to call a foundation repair specialist for an inspection. In many cases, these bumps are a sign of a more serious foundation issue, such as settlement or water damage. A reputable foundation contractor can help you determine the root of your problem and repair it for a lasting, healthy home.

Water Damage

Drywall is a relatively sturdy material, but water damage can cause major problems for homeowners. It can sag or collapse when wet, leaving unsightly marks on walls and ceilings and requiring expensive repairs. It can also lead to mold and mildew that threatens the health of occupants. Fortunately, there are many ways to fix water damage in drywall and restore the appearance of your home.

First, identify the source of the moisture and stop it if possible. Then, dry out the area by opening windows and running fans. After the room is dry, you can start repairing the damage. Before attempting to repair a water damaged drywall, make sure to put down drop cloths or tarps to catch any drywall pieces or dust that might fall off the ceiling during the process.

Next, inspect the damage for signs of mold and mildew. If you see mold spores, it’s important to call in a professional service right away. Mold spores can be toxic to humans and can exacerbate any existing allergies or respiratory issues.

If you find no evidence of mold or mildew, a small amount of water damage can usually be repaired without the help of a professional. Drywall compound can be used to fill the crack in a drywall seam, but it is important to use the correct type of drywall compound. Regular all-purpose drywall compound will work in most cases, but you can also purchase a lightweight variety that is easier to sand.

Once you have the proper compound, apply a thin coat to the wall surface where the old tape was removed. Then, place a strip of fiberglass tape over the seam, bridging the gap between the ends of the existing tape (Image 4). Use a putty knife to smooth wrinkles and bed the tape into the compound.

If you have a large area of water damage in your home, it may be best to call in a professional. They can assess the damage and determine if it’s possible to salvage your walls or if you need to replace them altogether.

Loose Tape

When drywall tape begins to peel off of a wall or ceiling it creates an unsightly mess and allows moisture in where it doesn’t belong. This can also damage the drywall beneath and cause additional problems. Luckily, this is an easy fix and it’s no more difficult than doing a regular patch job. First, use a utility knife to cut along the loose section of tape, being careful not to rip it off completely. Then, remove the loose section of tape and re-tape the area using new drywall compound. This time, be sure to put a thick enough bead of caulk underneath the tape, this will prevent further loosening and keep it from pulling away from the drywall again.

This can happen if the taping wasn’t done properly, usually due to a lack of mud being used in the joint. It can also be caused by temperature fluctuations, or even just a bad install. It seems like the original installers of this garage drywall job did not use enough mud under the tape and just pressed it in there.

If you notice this problem it is important to make a note of where the loose tape is located, and then check the rest of your work for similar problems. This will allow you to correct the problem in a timely manner, and save yourself a lot of time in the future.

Another common issue with drywall is paint bubbles. This is a sign that the mud didn’t dry before you painted over it. You can usually resolve this by scraping the paint off and re-mudding the area. Be sure to use proper technique and apply multiple thin coats, letting each one dry fully between each application.

If you have a popcorn ceiling, you may have to re-do the texture as well. Homax has a popcorn touchup kit in spray cans that works great for this, you can find it at most home improvement stores that handle drywall supplies. It comes with the spray can and a pre-mixed texture, just spray it on and wait for a light skin to form, then lightly sand and you’re good to go!

Cracks

Cracks appear in walls for a variety of reasons. Most of the time, they are harmless and can be repaired easily with wall crack filler. However, some cracks can be a sign of serious issues and should be addressed by professionals.

When a house settles, it can cause small cracks to appear in the walls. This is particularly common in older homes, as the building moves into its foundations and compacts over time. Usually, these cracks are no more than a few inches wide and are most noticeable near doors and windows.

Hairline cracks that are straight and follow the seams of drywall can also occur due to temperature changes or humidity fluctuations. These are often not serious and can be filled in with a simple spackling paste or can be painted over. Cracks that are crooked or diagonal may indicate more serious structural problems and should be checked by professional engineers.

Holes in drywall are another frequent problem that requires a quick repair. Holes in drywall can be caused by nails protruding through the sheet or from tools used for construction, renovation or painting. They can also be a result of water damage or from condensation. Regardless of the cause, holes should be repaired quickly to maintain the value of your home and reduce the risk of mold.

Drywall ceiling repair is more complicated than repairing drywall in the walls of your home. Ceilings are harder to reach, and the repairs are more extensive. They may also require the removal of more than one piece of drywall to fully repair. In addition to the cost of materials, a ceiling drywall repair can be more expensive because it takes more time to do.

If you find a crack in your home, it is important to monitor it over time to determine whether the crack is continuing to grow or is resolving. A professional engineer can evaluate the problem and recommend a course of action for proper repair. They can also help you identify the source of the issue to prevent it from occurring again in the future.

Sprinkler Repair – How to Spot Common Problems With Your Sprinkler System

Irrigation professionals know your system like the backs of their hands. They can help you identify issues and quickly fix them, saving you time and money.

Whether it’s broken sprinkler heads, low water pressure, or clogged nozzles, timely repairs are essential to a lush, healthy lawn. These tips will teach you how to address these issues, as well as prevent future problems. Contact Sprinkler Repair Harrisburg PA now!

One of the most common problems with sprinkler systems is a malfunctioning solenoid. These plastic pieces with electrical wires control how much water flows based on the power they receive, and if one of them fails, your system can stop working altogether or not function as well as it should. A professional sprinkler repair company will be able to find and fix this problem for you.

The first step in troubleshooting a valve solenoid is to turn off the water and power to the affected zone. Taking this precaution will protect you from getting electrocuted and will prevent the water or electricity from flowing back through the solenoid, possibly damaging it further. Once this is done, you can look for signs of a mechanical problem with the diaphragm on the valve or other internal parts. If this is the case, you will need to replace it.

A more serious problem with sprinkler valve solenoids is a lack of water flow to a specific zone. This can be due to a number of factors, including blockages or interference from tree roots. However, it is also possible that a problem with the controller or wiring is to blame. To help identify these issues, homeowners can conduct a few tests.

Water leaking around the sprinkler valve can be a sign that it is defective, as can muddy or wet areas near the valve. This can happen when the sprinkler is running or if it is not turned on at all. Whether the leak is large or small, it can cause damage to your property and lead to expensive repairs.

Another common problem with sprinkler valves is that they can become stuck open or closed, preventing the passage of water to the surrounding area. While this can be caused by a variety of issues, it is often due to dirt buildup in the transmission fluid filter or other components. Performing regular maintenance and replacing the transmission fluid regularly can prevent this from happening.

Other problems with sprinkler valves include faulty weather sensors or water pressure imbalances. These can affect one sprinkler station more than another, leading to overwatering or underwatering in different zones. It is a good idea to check these components periodically and to use waterproof connectors to ensure that they remain free from moisture and debris.

Clogged Nozzles

Clogged nozzles are a common problem that can significantly impact industrial spray systems. Depending on the severity of the issue, it can interfere with the spray coverage, flow rate, and even droplet size. When these issues arise, they can quickly lead to product waste and downtime. The good news is that there are a variety of solutions to address these problems and restore the efficiency of your spray system.

Incorporating self-cleaning nozzles into your spray system can greatly reduce the occurrence of blockage. These nozzles are designed with mechanisms that automatically clear the nozzle of blockage, eliminating the need for manual cleaning and minimizing downtime. This is especially beneficial in applications where nozzle clogging is a frequent problem.

Another solution is to add strainers into your spray system. These are designed to filter out solid materials, such as metal flakes from pipes, before they reach the nozzle orifice and cause blockage. These are available in both integral and T-style strainers, so you can find the option that best fits your application.

Leaks in the sprinkler pipe can also contribute to low water pressure. Checking your pipes regularly for leaks is an effective way to ensure that the water supply remains unobstructed. Look for wet spots in your yard or around the home and listen for hissing sounds, which often indicate a pressurized leak.

A sprinkler system’s sleeves are designed to keep mud and dirt out of the heads, but over time they can become dirty. In addition, they can become blocked by debris that has made its way inside the head’s screen. A powerful head cleaning can remove most of these issues, but if a clog persists, it may be necessary to replace the sprinkler head.

A regular maintenance schedule for your sprinkler system is an excellent way to prevent clogs and other problems. In addition to checking and repairing any broken parts, this schedule can include routine head cleanings and nozzle inspections. Additionally, it is important to understand how your sprinkler system works so you can identify any potential problems early and prevent them from causing severe damage or wasting water.

Leaking Pipes

A single leaky pipe may seem harmless, but over time it can add up and cause substantial water damage. In addition, a constant drip is not only annoying and inconvenient but can use as much as 34 gallons per year. A home warranty provider can help you identify and resolve these problems quickly and effectively.

Leaks are one of the most common sprinkler system problems and can affect any type of pipe, whether it’s copper, steel or PVC. Many of these leaks occur in the joints and fittings where the pipe meets other components, such as a valve or a wall. A professional plumber can repair these leaks using a variety of methods, including epoxy putty or solvent welding.

If you suspect a leak, the first step is to turn off your water supply and check for any signs of water damage. Then you can assess the severity of the leak and determine how best to remedy it.

Depending on the size and location of the leak, it may be possible to fix it yourself. For example, if the leak is at a connection with a pipe that runs through your walls, it’s easy enough to wrap the joint with self-fusing silicone tape. Just make sure you dry off the surrounding area before applying the tape. This method works best for metal or copper pipes but may be suitable for some PVC and PEX connections as well.

Corroded pipes are more difficult to fix and will require professional attention. This may include removing the affected section of pipe and replacing it with a new piece. In some cases, you may need to cut into your walls and then apply a epoxy seal.

Other causes of leaking pipes include poor workmanship, such as solder joints that fail under pressure, or careless installation, such as when a sprinkler line is connected to a drainpipe without a union. During your annual inspection of the piping, fittings and sprinkler heads look for any sign of corrosion. This can be as simple as a musty smell or a change in water flow, but it’s important to take action promptly. A leaking pipe can cause significant damage and lead to mold growth, so getting it fixed is essential.

Damaged Valves

Valves are the keystone of your sprinkler system, allowing you to control watering based on the unique needs of different zones in your landscape. But over time, these critical components are prone to wear and tear. Understanding some of the most common valve problems can help you spot issues early and take action quickly to keep your lawn hydrated, lush, and healthy.

Symptoms of a damaged valve include sprinkler heads that won’t pop up, uneven watering across your lawn, or excessively wet or mushy areas. These can also indicate that the diaphragm isn’t functioning properly, leading to insufficient water distribution or even severe leaks.

The good news is, replacing a broken solenoid isn’t as difficult as it might seem. You’ll need a new solenoid, a pair of pliers, and waterproof wire connectors (available at any hardware store in Bowling Green). Start by shutting off the water supply to your irrigation system—it’s best to do this by turning off your controller first so you don’t accidentally cause a geyser or experience unnecessary water waste as you work. Carefully remove the valve lid and clear away any debris that might be clogging it. Then, using a pair of pliers, unscrew the old solenoid. Make sure to note its orientation so you can replace it correctly. Finally, screw in the new solenoid, being careful to ensure a tight fit. Be sure to re-screw the wiring with the waterproof wire connectors to ensure a moisture-proof connection.

Over time, the internal components of a sprinkler valve can wear out, especially in a hardwater environment like those found in Bowling Green’s Mitchell Historic District or University neighborhoods. Fortunately, a professional can perform an easy replacement process that involves shutting off the water, disconnecting the wires on the existing valve, and swapping out the valve for an identical one with a fresh diaphragm and springs. Then, the professional will reconnect the new valve and re-test it to ensure it operates as expected. This process usually takes an hour or two. Unless you have experience with electrical components and cutting PVC pipe, we recommend having a professional handle this task.

Why You Should Install a Pool in Your Home

Swimming is a low-impact, full body workout that gets your blood pumping. It’s also gentle on the joints and can help with muscle recovery from injuries.

Instead of spending money on a gym membership, having your own pool is a great way to keep the kids busy. In addition to swimming, a pool can host fun games like water basketball and volleyball. Contact The Woodlands Pool Company now!

Installing a pool in your home can be a great investment. This backyard addition adds beauty, style and luxury that can boost your property’s resale value and make it more appealing to prospective buyers. In fact, many homeowners report that their pool has increased the overall marketability and value of their homes.

A luxury pool can increase your property’s resale price by as much as 10%. However, the exact amount depends on the location and pool type.

In addition to increasing resale value, high-end pools can also enhance your property’s curb appeal. Whether you choose to use a traditional pool or one with more modern features, such as an infinity edge, you’ll notice an instant boost in your property’s appeal.

When it comes time to sell your home, a well-maintained and beautiful pool can make the process much easier and faster. Having a pool can attract a wide range of potential buyers, especially families with children and those who enjoy outdoor entertaining.

A home with a pool can be an excellent choice for buyers who are looking for a comfortable living space in a warmer climate. In fact, pools can even increase the value of your neighborhood, which is a major selling point for some potential buyers.

Increases Home Value

Many real estate experts agree that high-end pools are a great way to boost your home’s resale value. This is because they add a touch of luxury that appeals to potential buyers who are looking for a place to cool off during the summer heat or relax after a long day. They also provide a fun, outdoor space for family gatherings and social events. And with recent tech advancements in swimming pool equipment, they are easier to maintain and safer than ever.

Homes with pools are especially attractive to buyers in areas characterized by warm climates, where the pool offers a year-round recreational area. Moreover, they tend to sell faster and at higher prices than those without pools, as they are in demand among buyers who seek a unique, upscale living experience.

However, the exact value added by a backyard pool will vary depending on a number of factors, such as the neighborhood and property size. For example, a pool that is in poor condition or does not blend well with the surrounding landscape may not enhance the overall home value. Additionally, the type of pool also plays a role in the home’s value; for example, vinyl liner pools are less expensive and easier to maintain than concrete or fiberglass pools. Nevertheless, only home buyers can decide if a pool will improve their quality of life. In addition, homeowners should consider the amount of money they will spend on pool installation and maintenance to determine if they will be able to recoup the costs when they sell their property.

Enhances the Outdoor Living Space

The addition of a pool to your backyard extends the living space of your home, creating a comfortable retreat for relaxation and entertainment. A residential pool can be equipped with various integrated build-ins to maximize its functionality, transforming it into a multipurpose space that provides enjoyment year-round. Amenities such as outdoor kitchens, bar areas, fire pits, built-in seating, and storage solutions streamline poolside activities and enhance your lifestyle.

Incorporating water features such as fountains and waterfalls elevates the appearance of different pool shapes, crafting an idyllic ambiance that soothes the mind and body. These embellishments adapt effortlessly to both contemporary and classic pool designs, elevating the aesthetic appeal of your private backyard oasis.

To maximise comfort and facilitate poolside lounging, incorporate lounge chairs, reclining seats, and cozy furniture pieces in styles that suit your lifestyle and design preferences. Opt for weather-resistant materials that withstand exposure to water, sun, and mildew. To create a seamless transition between indoor and outdoor spaces, use patio doors and windows that open directly onto your pool area, blurring the lines between inside and outside.

Illuminate your outdoor living space with strategically placed lighting to enhance its ambiance and safety. Ensure that walkways, landscaping, and decorative accents around your swimming pool are well-lit to prevent accidents and promote safe usage during the night. Incorporate automation and remote monitoring systems to manage your pool’s settings effortlessly, from adjusting water temperature to regulating lighting and filtration with just the tap of a button.

Saves Money on Gym Memberships

No other workout burns calories, firms every muscle, and boosts metabolisms like swimming. That’s why many gym-goers choose to invest in a pool at home. And that investment is a wise one because it can save you money on gym memberships, which aren’t always worth the monthly fee.

A gym can cost you up to $100 a month. That’s a lot of money to drop on an activity you may only use for a few months each year. Plus, you pay for equipment that will sit unused most of the time. And don’t forget about all the other fees, such as registration and maintenance costs.

Those expenses add up quickly and can cause you to reconsider your fitness goals. Investing in a backyard pool and installing the right equipment can actually be less expensive than paying for a gym membership, especially if you only plan to use it a few times per year.

For those who are committed to group fitness, consider an app that simplifies bill splitting for workout partners, such as Switch. Its design is tailored to support collective payments and emphasizes accountability and transparency in payment distribution. This encourages trust and reinforces camaraderie among workout groups.

Relaxes the Body

Your pool is the perfect setting to relax the body. The weightlessness of the water combined with the soothing sound of rippling water sooths the senses and creates an experience that feels meditative. In addition, the rhythmic strokes of swimming and controlled breathing mimic the techniques of meditation, which has been shown to reduce stress levels.

The tranquil blue color of a pool is also known to promote feelings of peace and calmness. The calming effects of the pool can be heightened by including elements that evoke tranquility, such as soft lighting and relaxing music. Aromatherapy, when used in conjunction with a soothing pool environment, can further enhance the relaxing effects of your backyard escape.

Even a quick dip in the pool can boost mood and provide relief from mental exhaustion. The act of swimming stimulates the brain to release feel-good chemicals, and the movement of the water soothes tense muscles. It can also help relieve back pain, arthritis and fibromyalgia by reducing pressure on sore joints and muscles.

For a more focused relaxation session, consider setting aside time for a morning ritual of gentle stretching and yoga by the pool or an evening routine of floating meditation in the cool water. This combination of exercise, physical relaxation and mindful practices can improve sleep patterns and contribute to overall stress reduction. Regular relaxation by the pool can also promote vitamin D exposure, which is essential for bone health and immune system function.

Brings the Family Together

Swimming together is a fun and social activity that encourages family bonding and promotes a healthy lifestyle. Home pools are more than just a place to cool off, they create a hub of activity that can foster memories and shape a familial lifestyle centered on joy and connection.

Pooling has regained interest in the global human resource and benefits community as companies seek to manage their risk more effectively using pooling arrangements. These include multinational pools, which provide advanced risk management and governance, centralized reporting, and the opportunity for pool dividends.

While many families have busy schedules that include work, school, hanging out with friends, and extracurricular activities, spending time at the pool is a great way to unwind and reconnect. Adding features like a basketball hoop or small putting green to the pool can add an element of competition and increase the amount of active family time that is enjoyed.

In addition to being a fun, social activity, swimming also provides a low impact exercise that increases heart rate and lung capacity. As a result, it is a good activity for all ages and can help improve endurance. Moreover, the act of swimming forces one to put down their digital device and engage in face-to-face communication with the family. So, next time you find yourself by the pool, take a moment to grab the kids and have a belly flop contest or see who can hold a handstand for the longest.

How to Properly Prepare Your Trailer For Towing

Western Towing involves transporting a vehicle with a specially designed towing vehicle. This service is commonly utilized when a car breaks down or suffers other issues that prevent it from being driven safely.

Most towing coverage providers offer 24/7 availability, providing peace of mind for drivers who encounter roadside emergencies. These include a midnight breakdown on a lonely highway or a midday tire blowout during rush hour.

Whether you’re pulling a trailer loaded with work equipment for a day of project work or your family’s personal vehicle and trailer for a weekend getaway, learning how to tow a trailer safely and correctly requires the right knowledge and skill. With proper preparation, the towing process is manageable for most drivers.

When pulling a trailer, be sure your vehicle is in good working condition with fresh oil and tires, and keep up with regular maintenance schedules. This will help reduce stress on your truck or SUV, which is especially important if you tow often. Depending on the type of towing you do, safety precautions may also be required for specific situations, such as activating hazard lights or setting up flares in case of an accident.

Before starting a towing business, check out competition and learn the ins and outs of local towing regulations. Some states require towing businesses to register with the Department of Transportation, while others mandate certain procedures or licensing requirements. For instance, if you’re doing non-consensual towing (transporting abandoned vehicles from private property to impound lots for sale), you may be required to notify police departments and all parties with legal interest in the vehicle within a specified timeframe, or you might be obligated to offer free storage for a certain number of days.

Towing businesses are considered “recession-proof,” as demand for roadside incidents, parking enforcement, and moving vehicles remains steady despite economic conditions. This type of business is a lucrative venture, but it’s important to plan ahead and consider legal, operational, and marketing issues before making the leap. One way to minimize risk is to form a corporation or partnership rather than operating as a sole proprietorship, as this can separate your personal assets from those of the company. Opening a business bank account is another effective way to make it easier to track business expenses and income. You should also get an Employer Identification Number and a DOT number if your towing business involves transporting vehicles across state lines. These can be obtained from the IRS or your local department of transportation.

Choosing a Tow Company

There are a number of factors to consider when choosing a towing service. A reputable towing company will have a good reputation for customer service, fast response times and clean and maintained equipment. They will also be able to handle a variety of vehicles and situations. Make sure to check online reviews before you select a towing service. It is important to look at both positive and negative feedback so that you can make an informed decision about the services they provide.

You should also make a list of companies that offer the services you need. This way, you will be able to compare costs and choose the best option for your situation. It is important to know that some towing companies charge different prices depending on the location, time and type of vehicle. So, you should always ask for a detailed breakdown of the costs so that you can avoid any surprises in the future.

Choosing a towing service with a strong local presence is also a good idea, as they are more likely to have the necessary resources and skills for dealing with heavy-duty towing. This includes specialized trucks, equipment and training that is necessary to safely transport commercial trucks. It is also important to choose a towing service that offers 24/7 availability, as emergencies can happen at any time of the day or night.

If you are unsure about the quality of a towing company, you can also ask for personal recommendations or leverage local industry networks. Connecting with other businesses, fellow trucking companies or local motorists who have experienced roadside incidents can help you make an informed decision. In addition, you should always look for red flags, such as unprofessional behavior or rude dispatchers.

Another important consideration is a towing company’s ability to handle a variety of vehicles and situations. A reputable towing company will have all types of vehicles and equipment that can accommodate a wide range of needs. They will also be able to handle various types of scenarios, including car accidents and lockouts. Moreover, a reputable towing company will be able to provide you with a fair price and excellent customer service.

Getting the Trailer Hooked Up

Whether you’re hauling your favorite offroad toys on weekends or transporting livestock to shows, having a reliable trailer will make the job easier. However, even if you’re experienced at pulling a trailer, it’s important to perform a thorough inspection before hitting the road. This will help ensure that your trailer is ready to haul and will also prevent any expensive damage to your vehicle or trailer. At Silver Moon Trailers, we offer several trailer services, including hitch installations, maintenance, and repairs. In addition to our extensive line of quality trailers, we also provide helpful tips and tutorials for new and veteran trailer owners alike.

Before starting, it’s best to find a friend to assist you in hooking up your trailer. Having someone to help you maneuver your towing vehicle and trailer will make it easier for you to keep the vehicles properly lined up while backing up. You’ll also want to agree on a set of hand signals for turning directions and when to back up or brake.

Start by making sure that the trailer jack is in the upright, unlocked position. Then, use the jack to lower the coupler until it rests gently on the hitch ball. Be sure to lubricate the coupler and hitch ball before you connect them. This will help maintain a smooth, lasting connection.

Next, you’ll need to attach the safety chains. Connect the chains in a crisscross pattern under the hitch and ensure that they meet or exceed your trailer’s gross weight rating. You may also want to consider installing a breakaway cable for additional safety.

When the coupler is latched on and everything is connected, check that nothing moves when you lift up the trailer tongue. If you see any movement, it means that the coupler is not sitting correctly on the hitch ball and should be repositioned. You’ll then need to secure the coupler latch and coupler lock to keep it in place.

After all the equipment is hooked up, it’s time to plug in the lights and brake wires. Make sure that the pigtails match up and are securely connected. Once that’s done, you’re ready to hit the road!

Driving the Trailer

Driving with a trailer can be intimidating for novice drivers. After all, you are doubling the length of your vehicle, and you will need to make a much wider turn when backing up or maneuvering in tight spaces. However, with some practice, it is not difficult to become comfortable with towing.

First, it is important to inspect your truck and trailer before taking them out on the road. Ensure that all lights are working and that all tires are properly inflated. Also, check the tow rating of your truck and trailer. This number tells you how much weight your vehicle and trailer can handle. It is important to understand this number, and not confuse it with the gross vehicle weight rating (GVWR). The GVWR refers to how much the vehicle can support pushing down on its frame, while the towing capacity is how much it can pull horizontally through the hitch.

Next, it is vital to drive slowly. Even if the speed limit is over 100mph, it is better to be safe than fast. Excessive speeds can cause trailer sway, which is dangerous to everyone on the road. It is also more difficult to react quickly to any situation that comes up while you are driving too fast.

Finally, take extra care when going up and down hills. Steep hills can be challenging for both the tow vehicle and the trailer. Use a lower gear when traveling up hills, and don’t brake hard during the descent. Braking too hard can cause the trailer to jackknife, which is unsafe for you and other drivers.

If you are worried about your ability to back up or navigate a tight space with a trailer attached, you can practice in an empty parking lot before hitting the road. This will help you familiarize yourself with your trailer’s dimensions, and it can give you the confidence you need to drive on the open road.

Finally, keep in mind that towing requires a lot more maintenance than normal driving. Regular oil and fluid changes, tire rotations, and wheel balancing are more important than ever when you tow. It is also a good idea to keep a fully stocked roadside safety kit in your vehicle, especially if you will be using it for towing frequently.

Choosing an Eye Doctor

Whether you need eye care or want to upgrade your prescription, finding the right medical professional can make all the difference. Ask your regular healthcare providers for recommendations, or check reputable medical review websites.

Once you’ve narrowed your list of possibilities, ensure your chosen ophthalmologist is in-network to keep your costs low. Also, please pay attention to how thoroughly they answer your questions. Contact Maryland Eye Care Center now!

The idea of someone poking around your eyes might make you a little nervous, but eye exams are completely safe, painless and necessary for healthy vision. They can also detect early signs of some health conditions, such as glaucoma and diabetes.

Your exam will begin with a questionnaire, which may ask about any symptoms you have or your family’s medical history. Be sure to fill it out carefully and answer all the questions truthfully, even those that don’t relate directly to your eyes.

Once the doctor has a clear picture of your medical history, she’ll start the tests. Some will check your visual acuity, which measures the smallest letters you can read on a Snellen chart at a distance and close to your face. She’ll also cover one eye at a time to see how your eyes work together. This test, called a refraction, determines your prescription. The doctor will then use a device called a phoropter, which has several lenses with different powers, to find the correct lens prescription for you.

Other tests will look for abnormal blood vessels or nerves in the back of your eye, which can be a sign of glaucoma. These tests involve blowing a puff of air in your eye or touching the surface with a small probe. Both tests are quick and painless, but they can cause dilation. If you’re worried about this, ask the doctor not to dilate your eyes for this part of the exam.

For the final part of your examination, the doctor will use a slit lamp microscope to examine the health of the front of your eyes, including the cornea and lens. She’ll then take digital photos of your retina and optic nerve. The doctor may recommend additional tests based on what she finds during the rest of your exam.

Your appointment will last an hour or two, especially if it’s your first visit to the new doctor. If you have a busy schedule, look for a doctor who has convenient hours and doesn’t require a long wait to get an appointment. Also, choose a clinic with up-to-date equipment; outdated tools can signal that the doctor doesn’t take your eye health seriously.

Preparation

If you are feeling nervous about your eye appointment, it may be helpful to bring a friend or family member with you for moral support. They can also help you remember any questions and concerns you might forget. Bringing a written list of your symptoms will help you make sure you cover all the points you want to. You should also make a list of any medications you are currently taking, including supplements. It is important to be honest about these, as some of them can interact with the eyes and have side effects.

It is also a good idea to bring any current prescription glasses or contact lenses you wear, so the doctor can assess their effectiveness. It is a good idea to remove the contacts before your exam, especially if you wear them overnight. It is a good idea to bring sunglasses as well, as your eyes will be dilated during the test and will be sensitive to light afterwards.

The eye doctor will begin the exam by reviewing your medical and vision history, and asking about any symptoms you are experiencing. They will then ask about your family history, as many eye conditions have a genetic cause and can run in families. They will also ask about any medications you are currently taking, as some can interact with the eyes and have side effects.

During the next part of the exam, the doctor will examine the exterior of your eyes, such as the whites of the eye and the position of the eyelids. They will also check your pupils’ reactions to light, as this can be a sign of certain eye problems. Then the doctor will check your vision (visual acuity) by having you read letters on a Snellen chart, which get smaller line by line. They may also do a cover test, where they will have you alternately cover one eye and then the other to see how well your eyes are working together.

For some exams, the eye doctor will give you drops that will enlarge or dilate your pupils. This will allow them to take a closer look at the inside of your eyes, and will also let them know more accurately what your refractive error is, so they can provide you with the correct prescription for glasses.

Examination

The eye doctor uses various instruments and techniques to check the health of your eyes. Depending on your history and general health, this part of the exam can take up to half an hour.

The doctor will ask you about any vision problems you have and how long you’ve had them. Your overall health, including any medicines you’re taking and your family history of eye or medical problems, will also be reviewed.

An examination of the front of your eyes will be performed, as well as an evaluation of the internal structure of the eye (called ophthalmoscopy). The doctor may look for signs of glaucoma or other diseases such as cataracts and macular degeneration. He or she will use a special instrument called a biomicroscope, which allows the doctor to examine the inside of your eye at high magnification.

Some comprehensive exams require the eyes to be dilated. The doctor will put eye drops in your eyes that make the pupils enlarge. This allows the doctor to use a series of tools to examine the eye’s interior, including its blood vessels, nerves and cornea. Some offices now have machines that allow the doctor to view the back of the eye (called the retina) without first having the pupil dilated, which can save time and money.

If you have a history of strabismus, the doctor will observe your eyes as they move together. The doctor will cover one of your eyes and then uncover it to see how far you can move each eye to align with the other. This can help detect abnormalities such as lazy eye or crossed eyes.

You’ll also be tested for how well you can follow a moving object with your eyes. The doctor will either move a target some distance away or ask you to quickly move your eyes between two separate targets positioned some distance apart. The doctor might also test for any quick movements of the eyes (called saccades) to look for problems such as ocular motor deficits.

The doctor will determine your lens prescription. This is done by having you look through lenses of varying powers and then using a handheld lighted instrument called a retinoscope to evaluate your results. Alternatively, the doctor might choose to use a machine that automatically estimates your prescription information (called an autorefractor).

Treatment

If you have an eye condition that requires treatment, it’s important to choose a practice with access to the latest diagnostic technology. For example, advanced imaging tools can detect early signs of eye diseases like glaucoma and diabetic retinopathy with remarkable accuracy. This information helps the eye doctor develop a treatment plan that reduces your risk of vision loss or blindness.

An Eye Care Practice with a Comfortable Support Staff and Clean Office Environment

Your doctor’s office should be well-organized, tidy and welcoming. This will set the tone for your visit and help you feel comfortable throughout your appointment. It’s also important to consider the support staff and whether they treat patients with respect and compassion. These factors can contribute to a strong doctor-patient relationship that improves patient outcomes.

An Eye Care Practice that Offers Comprehensive Services

A full-service eye care practice with optometrists, ophthalmologists and opticians on staff can ensure you receive consistent, high-quality eye care for all your needs. This may include the latest diagnostic equipment, specialized frames and lenses and other options for your eye health. A practice that offers a range of services can save you time and money by providing all your needs in one location.

An Eye Care Practice with Dedicated Support Staff

Dedicated support staff, including registered nurses, can assist eye doctors with many clinical tasks such as administering medication and preparing for surgery. They can also provide education on eye conditions and answer questions about medications and treatment. Some ophthalmic registered nurses can also perform administrative functions, such as scheduling appointments and managing medical records.

A neuro-ophthalmologist specializes in conditions that are caused by problems with the brain or optic nerve. These include nystagmus (uncontrolled movement of the eyes), asymmetry of pupil size — known as anisocoria — and other neurological issues like multiple sclerosis, traumatic brain injury and vascular abnormalities.

Microcentrifuge Tubes

Microcentrifuge Tubes are used in molecular biology applications to store and process samples, reagents, and DNA extracts. These clear 1.5 mL tubes fit all standard rotors and are autoclavable.

Some tubes have caps, while others have a skirt that helps them stand up without a rack. Look for these attributes when buying.

Laboratory professionals, whether working in chemistry or molecular biology, need to store and transport samples of small amounts of liquid. While many different tube types are available for this purpose, one type that’s popular with chemists and biologists is the microcentrifuge tube. These small cylindrical tubes are used in centrifuges to spin samples of liquid and separate them into varying layers.

The capacity of these tubes can vary, but the most common are 1.5 mL tubes. Laboratory technicians commonly use these because they are the perfect size for storing, mixing, and transporting molecular biology samples and extracts. They also fit well into most centrifuge racks and cryo boxes.

While most labs use plastic microcentrifuge tubes, glass options are also available for more sensitive applications. Both kinds of tubes come in a variety of shapes and sizes, making it easy to find the right product for your specific needs.

When buying Microcentrifuge Tubes, you should look for a manufacturer that offers a high-quality, durable product. The quality of these tubes is important because it determines how long they will last and how much centrifugal force (RCF) they can withstand. In addition, you should look for a product that is RNase/DNase/DNA free and pyrogen free to ensure your samples are safe.

Many of these tubes are made from polypropylene, which is a durable and sterile material. They are also autoclavable, making them ideal for use in molecular biology and other labs that work with biological samples. In addition, these tubes are designed to reduce protein and nucleic acid binding, which can improve sample recovery.

Microcentrifuge Tubes also come with a wide range of cap styles and sizes. While some may only have a snap cap, others feature a screw lid that provides a tight seal and prevents sample evaporation during storage. Some of these caps are also compatible with a vacuum pump, which can further enhance the protection of your samples.

Other features that can be found on some tubes are color-coded graduations, a wide lid rim for convenient handling, and a sturdier design that resists impact damage. Finally, there are some microcentrifuge tubes that are treated with silicone or have a chemically inert surface to protect the inside of the tube from contamination.

Material

Microcentrifuge tubes are made of plastic, usually polypropylene. They are used in labs to store and centrifuge samples. They have a wide range of applications, including soil testing and assessing toxins in water samples. They can also be used for genetic experiments and DNA extraction. The plastic material is resistant to most chemical reagents and can be autoclaved for repeated use.

Depending on the purpose of your lab, different plastics may be used for your microcentrifuge tubes. You can choose from polypropylene, borosilicate glass or polyethylene. Plastics are often chosen because of their versatility and low cost. Glass is more expensive and can be brittle, so it’s best to avoid using it for sample storage unless it’s necessary.

The plastics used in a microcentrifuge tube are also influenced by the type of centrifuge machine being used in the lab. The size of the rotor and the RPM of the centrifuge determine how much force is applied to each individual sample. Different types of samples require different amounts of force to separate them. A rotor with a larger radius will apply more force than a smaller rotor.

In addition to the type of centrifuge used, the materials in a microcentrifuge tube can also be affected by whether it is sterile or not. Sterile plastic microcentrifuge tubes are sterilized using g-radiation, which kills foreign organisms and mutates DNA. However, it doesn’t remove all nucleic acids and proteins. While some manufacturers offer sterile microcentrifuge tubes that are nuclease free, it’s important to confirm that the product you buy is sterile and nuclease free.

Globe Scientific offers a variety of disposable plastic microcentrifuge tubes in sizes from 0.5mL to 2mL. These are made of crystal clear medical PP and are highly transparent with a tight seal that prevents spillage during handling. The tubes are autoclavable and certified pyrogen and RNase free. They are also a great choice for storing light-sensitive reagents that can be exposed to UV light. These tubes come with a clear screw cap that protects the sample from evaporation and can be labelled with a permanent marker.

Cap

The cap of a microcentrifuge tube is an important factor to consider. It is important that the lid is able to be opened and closed easily and safely. This will improve your overall experience in the lab and prevent accidental openings of your samples during centrifugation or while handling. It also helps to ensure that your sample remains sterile.

The rim of the cap should be wide enough to accommodate a finger or fingernail for gripping. It should also be rounded to prevent pinching and allow easy opening. Some caps have a special molded in elastomeric seal to resist leaks and help keep your sample securely sealed. The cap should also have a labeling area for product marking or identification and be able to withstand high centrifugal forces.

There are many types of caps available for microcentrifuge tubes, including snap cap, screw cap, and tethered screw cap. Each type of cap has its own unique benefits. For example, a snap cap is ideal for one-time use applications such as aliquoting a sample for incubation. A screw cap is durable and is good for storing your samples. It also has a hinge, which reduces the chance of the cap accidentally opening during centrifugation or vortexing.

1.5 mL microcentrifuge tubes are the most popular capacity for molecular biology samples and work well with most centrifuges, tube racks, and cryoboxes. Many manufacturers offer tubes that have a little extra space above the final 1.5 mL graduation mark, but this varies from brand to brand.

Microcentrifuge tubes are typically made of robust virgin polypropylene and are certified RNase, DNase, and DNA free. They are ideally suited for the storage, processing, and mixing of small volume samples and reagents, such as aliquots, extracts, purified DNA, and protein samples. The tubes can be sterilized by gamma, ethylene oxide, or steam. Some companies also provide Certificates of Analysis on request.

Racks

Whether in the lab or freezer, laboratory centrifuge tubes need to be securely and reliably stored. Labconco offers a variety of quality 1.5 ml microcentrifuge tube racks made from sturdy and highly chemical-resistant borosilicate glass or polypropylene. These microcentrifuge tube storage systems are suitable for a number of different lab applications, including blood banking, DNA testing and more. All are sterile and autoclavable.

A centrifuge is a piece of laboratory equipment that spins liquid samples at high speeds to separate the material into groups based on density and size. Typically, larger centrifuges are used for samples that contain solid particles such as blood, while the smaller microcentrifuge tubes are used in molecular biology and other laboratories to separate small volumes of liquid.

Laboratory centrifuges spin a sample to force the particles inside to separate from each other, and then the centrifugal acceleration creates the gravitational pull that separates the heavier particles from the lighter ones. The separating process is accelerated when the rotor turns at a faster rate, and centrifugation can even separate DNA from other materials.

Plastic microcentrifuge tubes are also more durable than their glass counterparts and are able to resist most chemicals, making them suitable for use with a range of organic solvents. However, they may have a slightly higher risk of contamination when handled with chemical solutions or harsh detergents, so it is best to wash them in a sink full of distilled water after each use. Plastic centrifuge tips are less expensive than glass and can be cleaned in a similar way to other lab glassware.

In addition to being able to hold a large volume of liquid, these 1.5 ml microcentrifuge tubes have a clear, flat top that is easy to open and close. This cap helps ensure sample integrity by preventing leakage and promoting consistent, precise measurements. It also helps reduce the chance of accidental opening of the lid due to induced pressure during autoclaving or centrifugation.

Microcentrifuge tubes are commonly used in soil testing for toxins, and are also essential in medical labs to separate different elements. They can be re-used after centrifugation, but it is important to thoroughly wash them and sterilize the caps between each use. When cleaning and sterilizing the tubes, it is recommended that they are done in a class I or class II biosafety cabinet to avoid any contamination.

How to Find a Good Roof Replacement Contractor

Roof replacement is one of the most significant home renovations you can do. It protects your home and raises its value.

Roof Replacement

However, re-roofing isn’t always the best option. Depending on the material, roofing materials have a lifespan or “sell-by date.” Significant damage to a roof often requires a total roof replacement. Visit https://redstickroofing.com/lafayette to learn more.

When making any major purchase, cost is a big concern. Roof replacement is no exception. While the benefits of a new roof are clear, it’s also one of the most expensive home upgrades that homeowners can make. This is why it’s so important to research contractors and compare prices. However, don’t fall prey to the temptation of going with the first roofer that comes along. This can be a costly mistake. It’s recommended that you get a minimum of three quotes before selecting a contractor for your roof replacement.

The cost of a roof can vary widely, depending on the materials used and the size of your home. Prices are typically quoted per square foot, with some material options costing more than others. You’ll also need to consider labor costs, which can account for up to 60% of the total cost. This includes removing and disposing of the old roof and materials, as well as installing and cleaning up.

Other costs associated with roof replacement include gutters, venting, and soffit repairs. A soffit is the underside of the roof overhang, and it’s important to keep it clean and free of moisture to prevent water damage and other issues. It can be difficult to access, so you’ll likely need to hire a professional for soffit repairs or replacement. A soffit is usually made of metal and shaped like an “L,” and it’s responsible for directing water and air away from the roof. It can cost between $6 and $30 per linear foot to replace or repair.

Many counties require a building permit and inspection before beginning a roof project. This can add to the overall cost of your project, especially if you live in an urban area. In addition, some HOAs require permission before starting a roof replacement or repair.

Investing in a new roof will improve your home’s value and protect it from future damage. It can also increase your property tax base and lower your insurance premiums. In addition, a new roof can help reduce your energy bills by keeping your house cooler in the summer and warmer in the winter.

Materials

The roof is one of the most important parts of a home, protecting it from moisture and other environmental factors. The type of roofing materials used during a roof replacement project can impact its lifespan and curb appeal. In addition, the roof’s condition can affect a house’s overall value.

When choosing a new roof, homeowners should consider the desired lifespan of the roofing material, maintenance requirements, and cost. Additionally, they should consider the climate of their region and whether certain materials are better suited for specific conditions.

Besides shingles, there are several other materials that are required to complete a roof replacement. These include fascia, soffit, and plywood decking. While these structures do not receive direct rainfall, they are prone to damage from rain and sun exposure. They can also deteriorate due to rot, which can lead to leaks and other structural problems in the home. If the roofing contractor notices that these structures are deteriorating, they will replace them to prevent water leaks and other weather-related damage.

Another factor to consider when deciding on the best roofing material is the desired aesthetics of your home. For instance, wood shingles and shakes offer a rustic look that pairs well with historic-style homes. These materials are made from cedar, redwood, or pine and can be stained to match the style of your home. Wood shingles and shakes are more expensive than asphalt shingles but have a longer lifespan than the latter.

Other options for a new roof include ceramic, composite, and rubber tiles. They are affordable and durable, but they may not be suitable for all climates. In addition, these materials do not withstand hail and other extreme weather conditions.

Lastly, the roof’s flashing and gutters must be replaced or repaired to protect it from water leaks. The flashing is located around the chimney and where the roofing planes meet. In addition, the gutters need to be cleaned regularly to prevent clogs. If the gutters are clogged, it can cause water to seep into the home’s interior.

When selecting a roofing material, homeowners should consider the warranty offered by the manufacturer. Typically, warranties cover workmanship and materials for a period of 10 to 30 years. During the selection process, homeowners should ask about the length of the warranty and what it covers. Ideally, the contract should include both a workmanship and material service contract.

Installation

Your roof is one of the most important parts of your home. It protects you and your family from rain, snow, sun, and other extreme weather conditions. It is also responsible for keeping your house a comfortable temperature throughout the year. If you have a damaged or old roof, it is time to consider a replacement. However, the roof installation process is complicated, and it requires professional assistance.

Before your roofing contractors start work, they will make sure that everything is ready for the new roof. They will sweep the roof, remove any debris from around the property and dispose of it. They will also move any outdoor objects that might be in the way, such as potted plants or ceramic landscaping features. They will also need to cut back trees that are encroaching on the roof, and they will set up tarps to protect your lawn and driveway from any falling debris.

Once the tarps are in place, the roofing contractors will begin to prepare the roof for the new material. This will include removing any rotting wood and cleaning the surface of the roof decking. They will also remove any existing shingles or tiles and prepare them for new ones. They will also replace any rotted or damaged flashing, such as the rubber or lead boots that are located on sanitary stacks and other vents. The roofer will also install metal flashing along chimneys and projections, in valleys, on hip roofs, and near any other leak-prone areas of your roof. The contractor will use a special bead of roofing cement to seal these areas and help prevent water leaks.

The roofing experts at Brothers will also install any needed roof vents to increase the airflow in your attic and improve your energy efficiency. They will also add new vent holes to your eaves, and they will install drip edge along the edges of the roof. The last step is to install the ridge cap on the top of your roof. This is the final step of your roof replacement, and it will be inspected to ensure that it meets all city codes.

Warranty

Roofing warranties are essential for homeowners to have, providing a safeguard against unforeseen costs and defects that could jeopardize the functionality of their roofs. However, there are a few important details about these warranties that homeowners should be aware of in order to fully benefit from them.

Warranty Coverage

It’s important to know the terms of your roofing warranty, as these can vary widely depending on the contractor and manufacturer. For example, a manufacturer’s roofing material warranty typically provides a lifetime coverage against manufacturing defects, while workmanship warranties are usually capped at 10 years or less. Additionally, some manufacturers offer additional warranty options, such as wind and algae warranties, that can extend the lifetime of a roof beyond the standard 10 year mark.

Workmanship and Material Warranties

A key aspect of a quality roofing system is the workmanship and material warranties that come with it. Most roofing contractors offer a warranty of at least one to two years, while installation and contractor warranties can last up to 50 years. These warranties ensure that a homeowner’s investment is protected and provide peace of mind that the contractor has stood behind their work.

Workmanship and material warranties differ, but most include provisions that require the homeowner to have regular inspections in order to maintain their coverage. Failure to keep up with these inspections, or hiring a different contractor for repairs, can void these warranties, so it’s important to follow the instructions carefully in order to enjoy the full protection of your roofing system.

Some manufacturers also have “Total System Warranties” that provide a full replacement for the entire roofing system if any of the components fail, such as flashings, insulation, and shingles. These are typically only offered to those who install a complete roofing system from that manufacturer, and are meant to provide a high level of confidence for homeowners.

Lastly, it’s important to note that most manufactures will not honor warranties unless they are registered, so it’s vital for homeowners to do this as soon as possible. In addition, some warranties are only transferable once, so it’s important for homeowners to inform their roofers and the manufacturer of any changes in ownership in order to avoid having their warranties voided.