If you have a septic system, you should know that regular pumping of the tank is essential. Failure to do so could lead to the drain field or leach field becoming clogged with solids and groundwater contamination.
A septic tank holds wastewater and solid wastes until bacteria break it down. Solid wastes form a top layer that’s called scum while wastewater and sludge make their way to the drain field or leach field. Click the https://www.septictankarmadale.com.au/ to learn more.
Septic tanks are simple, effective onsite wastewater treatment systems that allow for the safe disposal of residential wastes. A septic tank is an underground watertight container (usually rectangular but can also be round) made of concrete, fibre glass or plastic. It has partition walls separating it into compartments and a sealed outlet. The septic tank holds all the excreta and wastewater from your household plumbing. It also provides a biological digestion process that reduces the size of solid wastes, preventing them from clogging the drain field.
The inlet chamber of the septic tank has an outlet baffle that allows the liquid portion of the wastewater to pass from the top to the bottom layer, while retaining any solids that are too large to be broken down by microorganisms. The septic tank has one or more inspection ports. These should only be used by qualified septic system professionals. Doing so could damage the septic system and cause the septic tank to leak.
As the septic tank fills, the heavier solids sink to the bottom of the tank in a layer called sludge. The lighter materials such as grease and laundry float to the surface and form a layer known as scum. Microorganisms digest the scum layer. As the sludge and scum layers rise and fall, they agitate the liquid wastewater at the bottom of the tank, allowing it to break down.
When the tank reaches its capacity, the solids and sludge settle to the bottom of the tank and the liquid wastewater passes through a large opening into what is called the drain field or absorption field. This is a series of underground pipes in a gravel trench that extends into the soil underneath. The septic tank sewage is leached into the soil where it is further treated by filtration and absorption by the grass and earth above.
Keeping the drain field free of debris and obstructions is essential. You can do this by limiting the number of loads you run per day and by reducing the amount of laundry and dishwasher detergents that go down the drain. Don’t plant trees or park vehicles over the drain field or septic system as this can cause clogs and groundwater pollution. Regular pumping of your septic tank is another way to ensure the proper functioning of your septic system.
Septic Tank Design
Septic tank design is very important because the tank is where all the wastewater from your home comes in and out. If it is not designed correctly or not properly constructed then a lot of problems can arise that may cause the entire system to fail. There are a few key components to septic tanks that need to be kept in mind when designing and building your septic system.
The first component is the inlet pipe that leads into the septic tank. This needs to be a size and material that is sturdy enough to withstand the weight of your household waste. It also needs to have a slope of at least 2% all the way from your toilet to the inlet pipe to ensure that a proper flow is achieved.
Once the wastewater enters the septic tank it will begin to settle. It will form a layer of scum at the top and a layer of sludge at the bottom. This layer will continue to grow with the use of the septic system until it is time to have the tank pumped. This is normally done on a routine basis by a licensed septic disposal company.
A septic tank should have a baffle to prevent solids from flowing out with the wastewater. It also should have an outlet to ensure that the sludge and scum layers do not overflow. The septic tank should also be large enough to allow for regular desludging and inspection.
Lastly the septic tank will need to be able to hold the liquid waste for at least three to eight years before it needs to be emptied. This is because the sludge and scum layer will continue to build up over time. If the sludge and scum are allowed to build up too much it could lead to a failure of the septic system in the future or cause a clog of the absorption field.
Once the wastewater leaves the septic tank it will travel into what is known as an absorption field, which is an area of your property that contains gravel trenches and soil that will absorb and treat the wastewater. In order to keep the absorption field in good shape it is necessary to mow the grass above and keep any trees or bushes away from it as they can grow into the pipes that run beneath the ground.
Septic Tank Installation
Septic tanks are an efficient system to treat wastewater, like a mini treatment plant in your backyard. But they can be confusing to install for homeowners who aren’t familiar with the process.
To get started, a septic tank contractor will perform a percolation test on your property and then design the system. Once the designs are approved, the excavation will begin. This is a labor-intensive step and can take up to three weeks. It’s important to work with an experienced septic tank installation company to ensure that the size of your septic tank is right for your home and that your leach field is correctly sized and located.
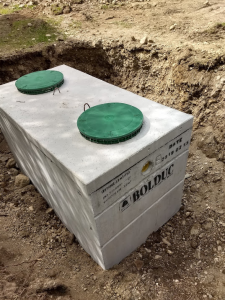
Once the excavation is complete, your septic tank can be installed. A reinforced concrete tank or a plastic/fiberglass one are both common choices. Once the tank is in place, it will be connected to your household plumbing so that wastewater can be transported to and from it. To make sure that wastewater is transporting effectively, it is important to keep the septic tank’s inlet and outlet pipes lined with the correct materials.
A septic tank works by collecting all the wastewater from your house, including sinks, toilets, laundry and dishwashers. This waste flows into the septic tank, where solid waste settles at the bottom and fats drift to the top. The liquid waste then leaves the septic tank through an exit baffle, which keeps solids from discharging with the wastewater into the drain field.
The septic tank must be properly sized to fit your home and prevent overflowing. Overflowing can contaminate soil and groundwater, and it can also cause sewage to backup into your home’s toilets. To avoid overflowing, a professional septic tank installer will install the proper sized septic tank for your home and will use the proper liner for your septic system’s inlet and outlet pipes.
A septic tank should be located on your property where it will be easy to access for routine pumping and inspection. To ensure that you can easily locate the septic tank, a riser should be installed over the tank’s central service hole instead of its sanitary tee or baffle inspection ports. Risers also make it easier to clean the tank and to inspect for a crack or leak.
Septic Tank Maintenance
All household wastes run through one main drainage pipe to the septic tank underground. Inside the tank, solid waste falls to the first chamber and is broken down by anaerobic bacteria and enzymes that turn it into a liquid. This liquid then flows over the half wall into the second chamber where it is pumped out into the drain field.
A well-designed septic tank can hold up to 1,000 gallons of water. It is usually precast from concrete and is buried in the ground.
The septic system must be maintained to keep it operating properly. If a homeowner is unsure of how to do this, the services of an experienced septic tank company should be called in for inspection and pumping. It is also important that the system be regularly monitored to ensure it is functioning correctly.
Ideally, the septic tank should be pumped before the sludge layer reaches 25 to 33 percent of the tank’s liquid capacity or the scum layer is four to six inches thick. The tank should be pumped more frequently if the home uses a garbage disposal or if there are excessive amounts of water used in the house.
As the wastewater leaves the septic tank it enters the absorption or lateral field, which is a series of pipes with holes in them in gravel trenches that are underground. From there, the sewage is absorbed into the soil and grass above.
In order for the septic system to work as designed, it is essential that homeowners not flush any items other than toilet paper, human waste and water down the drains. Chemical drain openers, solvents, cooking oils, sanitary napkins, latex paint and grease can all clog the drainfield.
It is also a good idea to keep plants and grass away from the septic tank and drainfield. In addition, a watertight riser and gasketed cover should be installed on the tank to allow for easy access in the future. Also, it is a good idea to keep automobiles and heavy equipment away from the septic system. Finally, it is recommended that the septic tank be inspected and pumped by a professional at least once every three years.
